Mahi-Mahi Resort
A fairly small stage built over a pool. The center plaza takes up a big share of it and there's little cover, so lines of fire from the high ground reach a lot. When each mode's condition is met (1.5 minutes in for Turf War, or count/checkpoint progress in ranked modes), the water level drops, revealing submerged platforms and widening the map. The Ver. 5.1.0 rework made the whole stage bigger, but it's still on the small side, with few routes into the enemy side.
Splat Zones
Zones tips
- You can see the whole zone from the high ground on each side, so that's the key spot for attack and defense. Taking the enemy's high ground gives you a big edge.
- You can reach the zone from the side as well as the front. Attack from both the front and the side to catch them in a crossfire.
- Before the water drops, going to the floating island on the right draws enemy attention, but it takes you out of the center fight, so check where your teammates are first.
 Custom Hydra Splatling
Players say: The few entry routes and open sightlines suit it, and some say that if the other team has no Charger, it can just keep firing freely.
★Weapons that shine here+3.0pt B
 Explosher
Players say: It can hit over cover and ledges with arcing shots and attack the enemy's high ground from below the ledge, and it keeps fighting well even after the water drops and more cover appears.
★Weapons that shine here+2.9pt C
 .96 Gal★Weapons that shine here+2.9
pt B
 Nautilus 47★Weapons that shine here+2.7
pt C
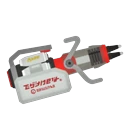 Heavy Edit Splatling★Weapons that shine here+2.5
pt S
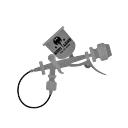 Aerospray MG★Weapons that shine here+2.5
pt B
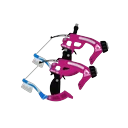 Dapple DualiesWeapons that struggle here-3.7
pt S
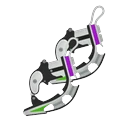 Dark Tetra DualiesWeapons that struggle here-3.6
pt B
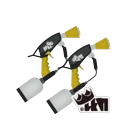 Enperry Splat DualiesWeapons that struggle here-3.1
pt S
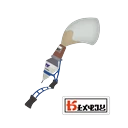 Inkbrush NouveauWeapons that struggle here-3.0
pt
Tower Control
Tower tips
- Breaking through the second checkpoint lowers the water. The fights at the first and second checkpoints decide the game.
- Before the water drops, the Tower's whole path is water, so be careful not to fall off when moving on the Tower.
- Before the water drops, there's no cover between the Tower and the enemy base, so long range has the edge. Clear out enemy Chargers and the like before you ride.
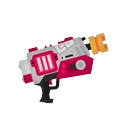 Rapid Blaster
Players say: Its blasts can ignore cover to some extent, making it easy to hit the enemy high ground from below the ledge.
★Weapons that shine here+1.7pt D
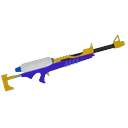 Splat Charger
Players say: There's clearly strong high ground and little cover, so from the high ground near the center your line of fire reaches almost end to end, making it easy to apply pressure without much risk.
★Weapons that shine here+1.4pt C
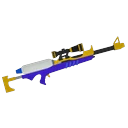 Splatterscope
Players say: There's clearly strong high ground and little cover, so from the high ground near the center your line of fire reaches almost end to end, making it easy to apply pressure without much risk.
★Weapons that shine here+1.4pt D
 Classic Squiffer
Players say: There's clearly strong high ground and little cover, so from the high ground near the center your line of fire reaches almost end to end, making it easy to apply pressure without much risk.
★Weapons that shine here+1.3pt D
 Custom Jet Squelcher★Weapons that shine here+1.3
pt C
 Range Blaster
Players say: Its blasts can ignore cover to some extent, making it easy to hit the enemy high ground from below the ledge.
★Weapons that shine here+1.2pt A
Dapple DualiesPlayers say: Before the water drops, the Tower's whole path is water and it's easy to slide off with a dodge roll's momentum. Even after the water drops, the Tower's path floats and it's hard to cross to the other side, so it can't make much use of its mobility.
Weapons that struggle here-2.4pt A
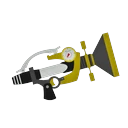 Sploosh-o-maticWeapons that struggle here-2.1
pt A
Dark Tetra DualiesPlayers say: Before the water drops, the Tower's whole path is water and it's easy to slide off with a dodge roll's momentum. Even after the water drops, the Tower's path floats and it's hard to cross to the other side, so it can't make much use of its mobility.
Weapons that struggle here-1.7pt B
Enperry Splat DualiesPlayers say: Before the water drops, the Tower's whole path is water and it's easy to slide off with a dodge roll's momentum. Even after the water drops, the Tower's path floats and it's hard to cross to the other side, so it can't make much use of its mobility.
Weapons that struggle here-1.6pt
Rainmaker
Rainmaker tips
- At the start, focus on breaking the Rainmaker's shield first. The plaza gets painted in the breaking team's ink, and your specials fill up fast.
- Climbing the left slope is the safe route for the Rainmaker. The right checkpoint is right in front of the enemy base, and you'll often get splatted there.
- Once you pass the checkpoint, the water drops and cover appears in front of you on the left route, making it easier to push.
Clam Blitz
Clams tips
- Clams mostly spawn in the center and on the left and right high ground, so fights tend to happen in the center. There's little cover, so focus on shooting from above.
- The basic plan is to go for the basket via the high-ground route up the slope on the far left.
- When the water drops, a route around the right side opens up, but it's conspicuous, so use it for surprise attacks while the enemy is focused on the high-ground route.
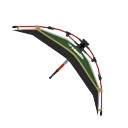 Tenta Brella★Weapons that shine here+2.1
pt C
SplatterscopePlayers say: There's clearly strong high ground and little cover, so from the high ground near the center your line of fire reaches almost end to end, making it easy to apply pressure without much risk.
★Weapons that shine here+1.7pt D
Splat ChargerPlayers say: There's clearly strong high ground and little cover, so from the high ground near the center your line of fire reaches almost end to end, making it easy to apply pressure without much risk.
★Weapons that shine here+1.6pt D
Classic SquifferPlayers say: There's clearly strong high ground and little cover, so from the high ground near the center your line of fire reaches almost end to end, making it easy to apply pressure without much risk.
★Weapons that shine here+1.3pt B
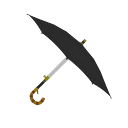 Undercover Brella★Weapons that shine here+1.3
pt D
Custom Jet SquelcherPlayers say: Its long range reaches across the whole small stage, and some players say it's brutal in Splat Zones and Clam Blitz.
★Weapons that shine here+1.1pt A
Dapple DualiesWeapons that struggle here-1.6pt B
 Tri-Slosher NouveauWeapons that struggle here-1.6
pt S
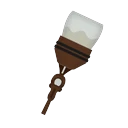 OctobrushWeapons that struggle here-1.5
pt B
Enperry Splat DualiesWeapons that struggle here-1.3pt
Turf War
Turf tips
- At the start, prioritize taking the center high ground (the center platform) over painting your side.
- At 1.5 minutes in, the water drops and more floor becomes paintable. If you hold the center, you can paint the new floor and build special faster.
- The waterside platform route on your left is easy to fall off and dangerous until the water drops. If you're going into the enemy side, the right side is relatively safer.
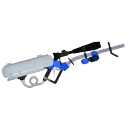 E-liter 4K Scope
Players say: There's clearly strong high ground and little cover, so from the high ground near the center your line of fire reaches almost end to end, making it easy to apply pressure without much risk.
★Weapons that shine here+1.8pt D
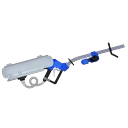 E-liter 4K
Players say: There's clearly strong high ground and little cover, so from the high ground near the center your line of fire reaches almost end to end, making it easy to apply pressure without much risk.
★Weapons that shine here+1.2pt D
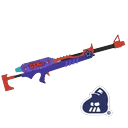 Z+F Splat Charger
Players say: There's clearly strong high ground and little cover, so from the high ground near the center your line of fire reaches almost end to end, making it easy to apply pressure without much risk.
★Weapons that shine here+1.2pt D
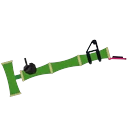 Bamboozler 14 Mk I
Players say: There's clearly strong high ground and little cover, so from the high ground near the center your line of fire reaches almost end to end, making it easy to apply pressure without much risk.
★Weapons that shine here+1.2pt D
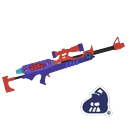 Z+F Splatterscope
Players say: There's clearly strong high ground and little cover, so from the high ground near the center your line of fire reaches almost end to end, making it easy to apply pressure without much risk.
★Weapons that shine here+1.1pt C
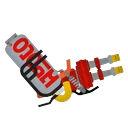 Hydra Splatling
Players say: The few entry routes and open sightlines suit it, and some say that if the other team has no Charger, it can just keep firing freely.
★Weapons that shine here+1.1pt B
Enperry Splat DualiesWeapons that struggle here-1.4pt C
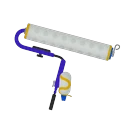 Splat RollerWeapons that struggle here-1.4
pt A
Inkbrush NouveauWeapons that struggle here-1.4pt S
Sploosh-o-maticWeapons that struggle here-1.3pt
Update changes
- Ver. 3.0.0: Terrain changed in Turf War and Splat Zones to reduce the impact of weapons that shoot from long range (confirmed on Inkipedia and the JP wiki).
- Ver. 5.1.0 (closed for the rework October 16-18, 2023): Terrain changed in all modes and the whole stage got bigger. Changes included an expanded area around your spawn, a bigger Inkrail platform in place of the slope to your base, new grate bridges and a new floating island, slopes to the side high ground in some modes, changes to the Tower route and the Rainmaker checkpoint position, and extra entry routes in Clam Blitz (Inkipedia, JP wiki).
- Post-rework view (JP wiki comments): Some like that it's bigger, making it easier for short-range weapons and Shooters to move and cutting down on falling into the water, but many complain that the extra grates gave long-range weapons more places to camp and that the long-range advantage hasn't changed.