Manta Maria
A long, narrow stage set on the deck of a sailing ship. The main battleground is the high ground and grates around the central mast, and there are lots of bumps from pillars and ledges, plus plenty of blind spots. In some spots you can fall off the ship and get splatted, and there's a back route where you jump over to the enemy side. The strong positions are all cramped, and it's said to be hard both to break a hold and to keep one.
Splat Zones
Zones tips
- There are two zones. Keep the zone on the right (seen from your side) painted at all times and it'll be hard for them to take it.
- First, set up just in front of the mast. From up there you can attack while reading the situation.
- To hold the enemy-side zone for long, you need to secure the slightly raised spot next to it.
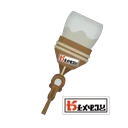 Octobrush Nouveau★Weapons that shine here+5.7
pt B
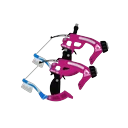 Dapple Dualies★Weapons that shine here+3.6
pt A
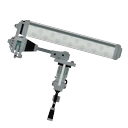 Dynamo Roller
Players say: The stage has strong positions, and arcing horizontal swings from them are said to work well. The community also says "Dynamo is strong on Manta."
★Weapons that shine here+3.5pt S
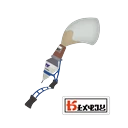 Inkbrush Nouveau
Players say: Some say its speed shines on a stage with so many grates, letting it go harass long-range players camped on spots like the right high ground.
★Weapons that shine here+3.4pt C
 Painbrush Nouveau★Weapons that shine here+3.2
pt S
 Dark Tetra Dualies
Players say: Some players share the impression that the Tetra Dualies are really strong in Splat Zones.
★Weapons that shine here+2.4pt D
 Custom Goo Tuber
Players say: There are only one or two spots to set up at the start, and they're too far away to do much. Step into the middle and you're targeted from all sides, and fast flankers are hard to deal with, so some Charger mains call it the map where Chargers struggle most (though another source says an E-liter can reach the enemy high ground from behind the mast in Splat Zones, so views don't fully agree).
Weapons that struggle here-3.0pt D
 New Squiffer
Players say: There are only one or two spots to set up at the start, and they're too far away to do much. Step into the middle and you're targeted from all sides, and fast flankers are hard to deal with, so some Charger mains call it the map where Chargers struggle most (though another source says an E-liter can reach the enemy high ground from behind the mast in Splat Zones, so views don't fully agree).
Weapons that struggle here-2.7pt C
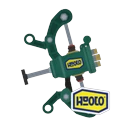 Custom Wellstring VWeapons that struggle here-2.6
pt D
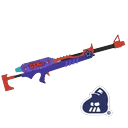 Z+F Splat Charger
Players say: There are only one or two spots to set up at the start, and they're too far away to do much. Step into the middle and you're targeted from all sides, and fast flankers are hard to deal with, so some Charger mains call it the map where Chargers struggle most (though another source says an E-liter can reach the enemy high ground from behind the mast in Splat Zones, so views don't fully agree).
Weapons that struggle here-2.6pt
Tower Control
Tower tips
- It's a short trip to the first checkpoint. Follow the basics: splat enemies first, then move the Tower.
- Frontliners should buy time fighting enemies around the Tower's sides and in front of the third checkpoint, while backliners cover from the platform beside the second checkpoint.
- On defense, have one player camp the high ground near the second checkpoint. It's close to the Tower, so even Shooters can reach.
Octobrush Nouveau★Weapons that shine here+2.2pt A
Dapple Dualies★Weapons that shine here+1.9pt A
Dark Tetra Dualies★Weapons that shine here+1.5pt B
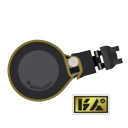 Nautilus 79
Players say: Take the central mast and you can see in every direction, and all the grates make good use of run speed. But others argue "Splatlings aren't especially strong here," so opinions are split.
★Weapons that shine here+1.3pt −
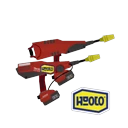 Custom Dualie Squelchers★Weapons that shine here+1.1
pt B
 S-BLAST '92Weapons that struggle here-1.3
pt D
 E-liter 4K
Players say: There are only one or two spots to set up at the start, and they're too far away to do much. Step into the middle and you're targeted from all sides, and fast flankers are hard to deal with, so some Charger mains call it the map where Chargers struggle most (though another source says an E-liter can reach the enemy high ground from behind the mast in Splat Zones, so views don't fully agree).
Weapons that struggle here-1.3pt C
 E-liter 4K Scope
Players say: There are only one or two spots to set up at the start, and they're too far away to do much. Step into the middle and you're targeted from all sides, and fast flankers are hard to deal with, so some Charger mains call it the map where Chargers struggle most (though another source says an E-liter can reach the enemy high ground from behind the mast in Splat Zones, so views don't fully agree).
Weapons that struggle here-1.3pt C
 Snipewriter 5H
Players say: There are only one or two spots to set up at the start, and they're too far away to do much. Step into the middle and you're targeted from all sides, and fast flankers are hard to deal with, so some Charger mains call it the map where Chargers struggle most (though another source says an E-liter can reach the enemy high ground from behind the mast in Splat Zones, so views don't fully agree).
Weapons that struggle here-1.3pt
Rainmaker
Rainmaker tips
- The left route is a straight shot to the checkpoint and relatively safe.
- The right route is shorter but needs a jump and risks falling, and near the checkpoint the Rainmaker's shield gets big, so it's easy to fall.
Clam Blitz
Clams tips
- On the right route, after the jump, climb the left wall and throw from the tip of the grate to reach the basket. Miss the jump and you lose the power clam.
- The left route is flat and easy to move on, but it's a long way to the basket. Advance once your teammates have gathered.
- Controlling the central high ground is the key to defense. Rather than waiting on the high ground in the back, get involved in the fight in the middle and defend in front of the basket.
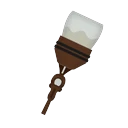 Octobrush★Weapons that shine here+2.1
pt B
 Painbrush★Weapons that shine here+1.8
pt A
Dapple Dualies★Weapons that shine here+1.5pt C
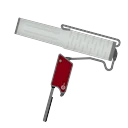 Flingza Roller★Weapons that shine here+1.4
pt S
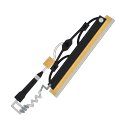 Splatana Wiper★Weapons that shine here+1.4
pt A
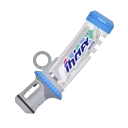 Mint Decavitator★Weapons that shine here+1.3
pt D
E-liter 4KPlayers say: There are only one or two spots to set up at the start, and they're too far away to do much. Step into the middle and you're targeted from all sides, and fast flankers are hard to deal with, so some Charger mains call it the map where Chargers struggle most (though another source says an E-liter can reach the enemy high ground from behind the mast in Splat Zones, so views don't fully agree).
Weapons that struggle here-2.8pt C
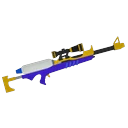 Splatterscope
Players say: There are only one or two spots to set up at the start, and they're too far away to do much. Step into the middle and you're targeted from all sides, and fast flankers are hard to deal with, so some Charger mains call it the map where Chargers struggle most (though another source says an E-liter can reach the enemy high ground from behind the mast in Splat Zones, so views don't fully agree).
Weapons that struggle here-2.0pt C
E-liter 4K ScopePlayers say: There are only one or two spots to set up at the start, and they're too far away to do much. Step into the middle and you're targeted from all sides, and fast flankers are hard to deal with, so some Charger mains call it the map where Chargers struggle most (though another source says an E-liter can reach the enemy high ground from behind the mast in Splat Zones, so views don't fully agree).
Weapons that struggle here-1.9pt B
Snipewriter 5HPlayers say: There are only one or two spots to set up at the start, and they're too far away to do much. Step into the middle and you're targeted from all sides, and fast flankers are hard to deal with, so some Charger mains call it the map where Chargers struggle most (though another source says an E-liter can reach the enemy high ground from behind the mast in Splat Zones, so views don't fully agree).
Weapons that struggle here-1.6pt
Turf War
Turf tips
- Take the central mast (high ground) and you can paint down on them freely. If you paint the mast's pillar, you can use it to refill ink too.
- You can squid-jump from near the middle over to the enemy side. If no one spots you, you can paint back a lot, but if you mess up, you fall and get splatted.
- The strong positions are all cramped, so spread out instead of bunching up. When breaking a hold, mix up the front and the sides, and retake the middle from the high ground on your side.
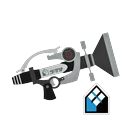 Neo Sploosh-o-matic★Weapons that shine here+1.4
pt S
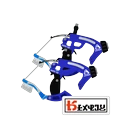 Dapple Dualies Nouveau★Weapons that shine here+1.4
pt A
Inkbrush NouveauPlayers say: Some say its speed shines on a stage with so many grates, letting it go harass long-range players camped on spots like the right high ground.
★Weapons that shine here+1.0pt D
E-liter 4KPlayers say: There are only one or two spots to set up at the start, and they're too far away to do much. Step into the middle and you're targeted from all sides, and fast flankers are hard to deal with, so some Charger mains call it the map where Chargers struggle most (though another source says an E-liter can reach the enemy high ground from behind the mast in Splat Zones, so views don't fully agree).
Weapons that struggle here-1.5pt B
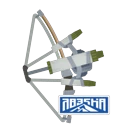 Inkline Tri-StringerWeapons that struggle here-1.2
pt A
 Custom Splattershot Jr.Weapons that struggle here-1.2
pt
Update changes
- When it returned from Splatoon 2, Inkrails were added (except in Rainmaker), the path beside the high ground near spawn was widened, and the escape boats near the start became paintable platforms you can stand on (Inkipedia, wikiwiki).
- Ver. 8.0.0 (May 31, 2024) slightly changed the terrain in all modes and also fixed a bug where a small height mismatch between the central grate and the terrain next to it made it hard to move between them (Inkipedia, Game8). We couldn't confirm any change in how players rate it afterward.