Um'ami Ruins
A fairly long stage that slopes down from the high ground at spawn into a circular plaza in the middle. The middle has climbable high ground and lots of small cover that breaks sightlines, while the areas near each base are open and give long-range weapons clear lines. Ver. 8.0.0 reworked it, mostly on the home sides, adding more defensive high ground so it's easier to recover after getting pushed in.
Splat Zones
Zones tips
- There are two zones, one on each side of the central high ground, and the count won't move unless you paint both, so lock down one of them first.
- Taking the central high ground lets you cover both zones, so go for it aggressively.
- Riding the Inkrail at the lower left of your side toward the middle makes you an easy target, so pick your timing.
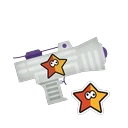 Custom Splattershot Jr.★Weapons that shine here+2.5
pt A
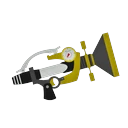 Sploosh-o-matic★Weapons that shine here+2.1
pt B
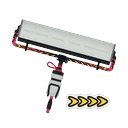 Carbon Roller Deco★Weapons that shine here+2.1
pt −
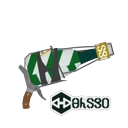 Foil Squeezer★Weapons that shine here+2.1
pt C
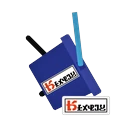 Tri-Slosher Nouveau
Players say: Sloshers can drop shots behind cover, so they can get attacks through even in the obstacle-packed middle.
★Weapons that shine here+2.0pt B
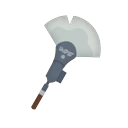 Painbrush★Weapons that shine here+1.9
pt D
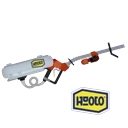 Custom E-liter 4K
Players say: Some point out that all the cover in the middle makes sniping from a fixed spot harder. Others say sniping is strong once you've taken the middle or your high ground and that "long range is still strong," so opinions are split.
Weapons that struggle here-3.0pt C
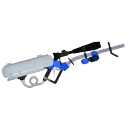 E-liter 4K Scope
Players say: Some point out that all the cover in the middle makes sniping from a fixed spot harder. Others say sniping is strong once you've taken the middle or your high ground and that "long range is still strong," so opinions are split.
Weapons that struggle here-2.9pt D
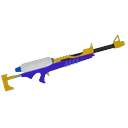 Splat Charger
Players say: Some point out that all the cover in the middle makes sniping from a fixed spot harder. Others say sniping is strong once you've taken the middle or your high ground and that "long range is still strong," so opinions are split.
Weapons that struggle here-2.9pt D
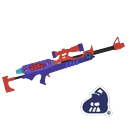 Z+F Splatterscope
Players say: Some point out that all the cover in the middle makes sniping from a fixed spot harder. Others say sniping is strong once you've taken the middle or your high ground and that "long range is still strong," so opinions are split.
Weapons that struggle here-2.8pt
Tower Control
Tower tips
- The first checkpoint is right next to the middle, so the opening fights get intense. Staying alive is priority number one.
- When defending the second checkpoint, focus on holding the high ground on your side no matter what, and don't hold back on specials if it's about to fall.
- When breaking a hold, charge your specials first and use them together with your team. Avoid charging in alone.
Rainmaker
Rainmaker tips
- At the start, focus all your fire on breaking the Rainmaker's shield, and don't get caught in the explosion when it pops.
- In front of the goal you're heading uphill, which puts you at a disadvantage, so fire Rainmaker shots up the slope to help your team advance.
- There's also an ambush route where you climb the blocks in the enemy base and jump onto the high ground with the grate.
Clam Blitz
Clams tips
- Whichever route you take, breaking the enemy's high ground first is key. Clear enemies off the high ground with subs and specials before you attack.
- Defenders who hold the high ground next to the basket can shoot down on enemies climbing the slope.
- The rework turned the low grate bridge into an F shape, so the route that climbs the enemy-side pillar around to the back of the basket is now shorter.
Turf War
Turf tips
- Abandoning the middle at the start to paint your side can get you pushed in fast, so paint your side after you take the middle.
- The central high ground overlooks the whole plaza and is a key position. You can only climb it from the front wall or the boxes on the side, so go for it together with subs and specials.
- The dip on the left (seen from your side) is in full view of the enemy, so don't wander in carelessly. If you paint it while you hold the middle, the enemy has to take risks to paint it back.
 Luna Blaster Neo
Players say: Cover is scattered across the middle, so Blasters, which can hit enemies behind cover with blast damage, have an easier time.
★Weapons that shine here+1.4pt C
 Range Blaster
Players say: Cover is scattered across the middle, so Blasters, which can hit enemies behind cover with blast damage, have an easier time.
★Weapons that shine here+1.4pt −
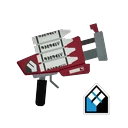 Clash Blaster Neo
Players say: Cover is scattered across the middle, so Blasters, which can hit enemies behind cover with blast damage, have an easier time.
★Weapons that shine here+1.3pt −
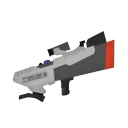 S-BLAST '92
Players say: Cover is scattered across the middle, so Blasters, which can hit enemies behind cover with blast damage, have an easier time.
★Weapons that shine here+1.2pt S
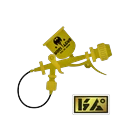 Aerospray RGWeapons that struggle here-2.0
pt
Update changes
- Ver. 8.0.0 (May 2024) reworked the terrain in all modes (Inkipedia, wikiwiki). The changes were mostly on the home sides, adding more defensive high ground so it's harder for enemies to push in deep.
- With the rework, Tower Control gained a checkpoint for three in total (wikiwiki, Inkipedia), the grate bridge in Clam Blitz became F-shaped to cut travel distance, and the zones in Splat Zones moved slightly toward each team's side (Inkipedia).
- Players reacted positively right after the rework, saying the bigger home high ground made breaking holds easier (Tricolor Sokuhou roundup). In a 2023 survey before the rework, it leaned unpopular overall, though long-range players didn't dislike it much (note).