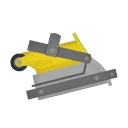
Dread Wringer
A Slosher that throws two blobs of ink in a row with each swing. Landing both does 90 damage, the damage barely drops no matter where it hits, and it paints wide swaths of floor and wall. It struggles in solo head-on fights. It's a support weapon: finish off weakened enemies your teammates are fighting, and use paint and zoning to give your team the edge.
Strength by modeTier and score (win-rate points vs. an average weapon).
| Mode | C–A | S–S+2 | S+3 and up | X Battle | Regular |
|---|---|---|---|---|---|
| Splat Zones | S +4.4 | S +6.8 | S +7.1 | S +4.6 | — |
| Tower Control | S +2.6 | S +2.8 | S +3.5 | S +2.9 | — |
| Rainmaker | S +4.0 | S +4.7 | S +4.3 | S +3.2 | — |
| Clam Blitz | S +3.9 | S +4.8 | S +4.4 | S +2.5 | — |
| Turf War | — | — | — | — | S +5.5 |
Best stages / Worst stages
Tower Control
Rainmaker
Clam Blitz
Turf War
Strengths
- Both hits together deal 90 damage, quickly finishing enemies your teammates have chipped or that are already hurt
- High burst painting that covers wide areas of floor and wall. Great at taking zones, especially together with Reefslider
- Effective range is slightly longer than the Slosher's, and arcing shots reach enemies behind walls or below cliffs
- Strong at chasing down enemies that have trouble hitting targets below cliffs, like the E-liter 4K
- End lag after firing is surprisingly short, so it's easy to slip into swimming
Watch out for
- Unless both hits land, it won't splat in two swings, and its raw TTK is slow. Head-on fights on flat ground are very tough
- Long wind-up before firing, and slow movement while firing
- Poor ink efficiency: only about 11 swings from a full tank
- Weapons that beat it on range or mobility, like the Sloshing Machine, Glooga Dualies, and Dualie Squelchers, are its worst matchups
- With little cover around, your positioning options shrink and you end up relying on your frontliners
Tips
- To splat, focus both hits on one point. To paint, swing your view side to side to spread the ink
- Moving your view a lot during the wind-up throws the second hit off, so lock your aim until the swing finishes (lowering your gyro sensitivity helps too)
- Only fight full-health enemies over cover or ledges, and jump in from the side on enemies fighting your teammates
- If you must fight head-on, swim between every swing
Common gear
Special Power Up, Swim Speed Up, Ink Saver (Main), Stealth Jump, Comeback, Last-Ditch Effort, Quick Super Jump, Sub Resistance UpThis kit
Suction Bomb blocks escape routes and high ground, and Reefslider's blast combos with your main for splats or repaints the zone in one go.Recent changes
- 11.0.0: System change for all weapons: main weapons get bigger hitboxes against players (the shorter the range, the bigger the boost), squid form gets a smaller hurtbox, and the game adds "Flow Aura" (a temporary power-up when you keep performing well) plus a remaining-health display (source 11)
- 11.0.0: Special change, Reefslider: 220-damage radius about 20% bigger, dash distance about 19% shorter, paint radius about 7% smaller (Dread Wringer) (source 11)
- 11.2.0: Special points 190→200 (Dread Wringer) (source 12)
- 11.2.0: Special change, Crab Tank: cannon blast radius reduced by about 14% (Hornz Dread Wringer) (source 12)